Installation Guide
This guide walks you through installing the Sync plugin for Adobe Premiere Pro, launching it for the first time, and signing in to your Sync account.
Prerequisites
- Adobe Creative Cloud installed and up to date.
- Adobe Premiere Pro 2025 (v25.6) or later — older versions are not supported.
- A Sync account — sign up here if you don’t have one.
Where to Get the Plugin
Adobe Marketplace (Recommended)
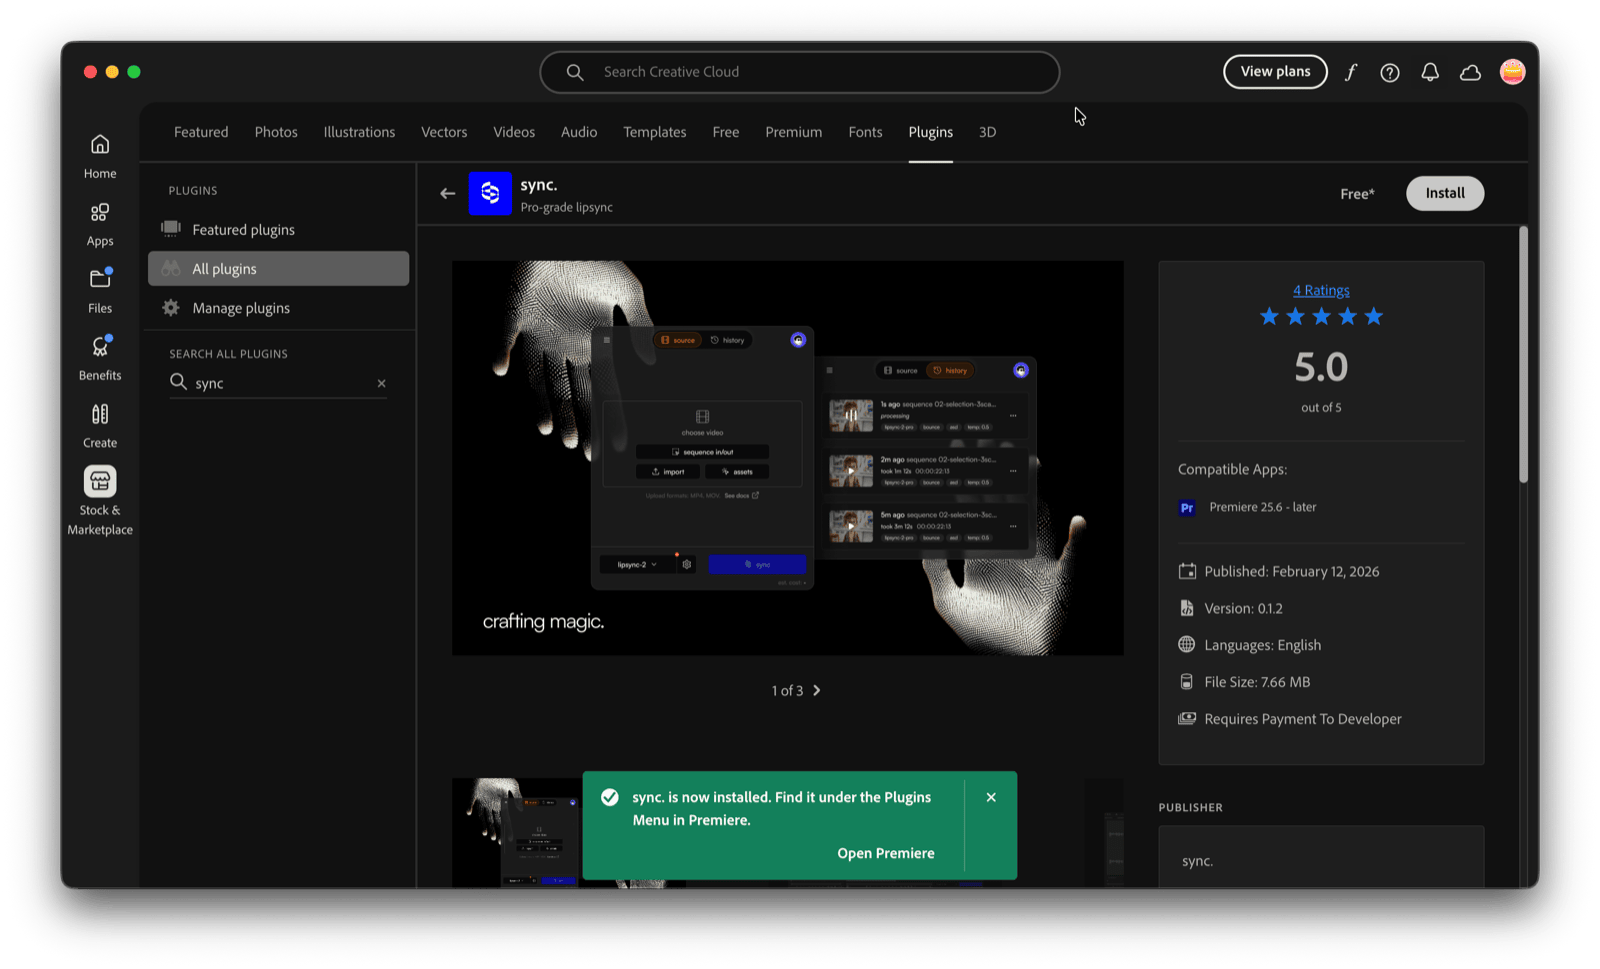
The Sync plugin is available on the Adobe Marketplace. This is the recommended way to install and keep the plugin up to date.
- Visit the Sync plugin on the Adobe Marketplace or search for Sync in Creative Cloud under Stock & Marketplace > Plugins.
- Click Install.
- Creative Cloud will handle the rest — once it’s done, the plugin is ready to use in Premiere Pro.
AEscripts + AEplugins (ZIP Download)
If you downloaded the Sync plugin from AEscripts, you’ll have a .zip file. Extract it first — inside you’ll find the Sync .ccx plugin file.
Option A: Double-click (Creative Cloud)
If you have Creative Cloud installed, double-click the .ccx file. This opens the Creative Cloud installer — follow the prompts to complete the installation.
Option B: ZXP/UXP Installer
- Download the free ZXP/UXP Installer from aescripts.com if you don’t have it.
- Open the ZXP/UXP Installer and drag the
.ccxfile onto the window, or use File > Open to select it. - The installer will handle the rest.
After installation, restart Premiere Pro if it was open.
Opening the Plugin in Premiere Pro
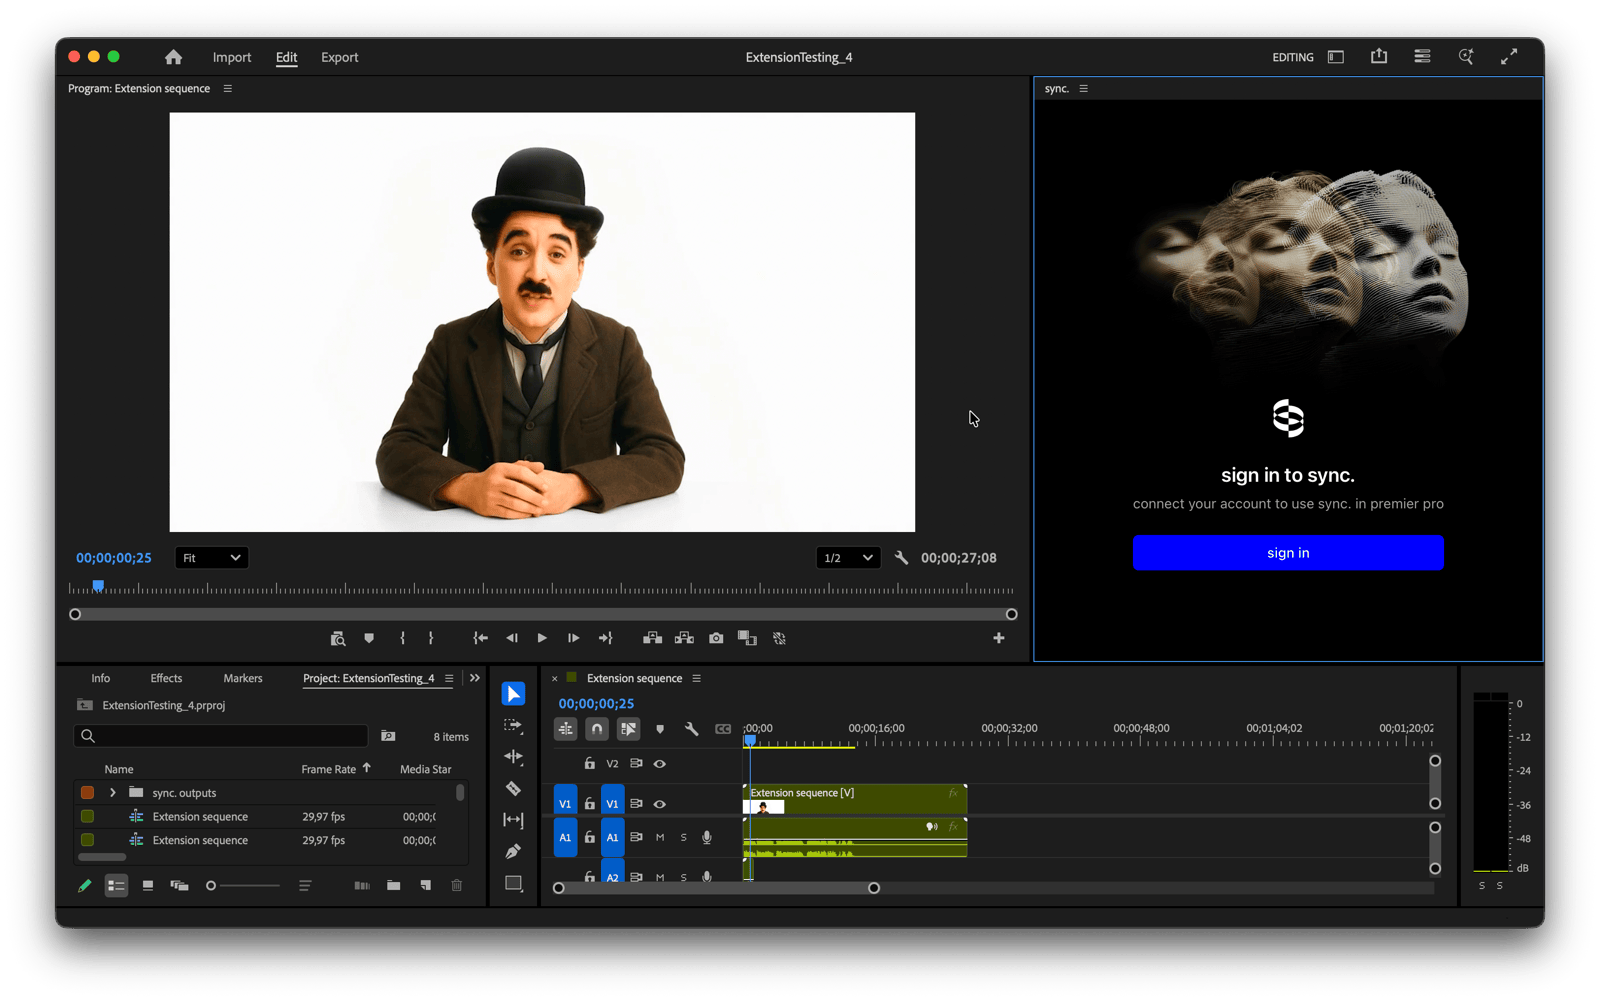
Open the Sync plugin
In the menu bar, go to Window > Extensions > Sync.
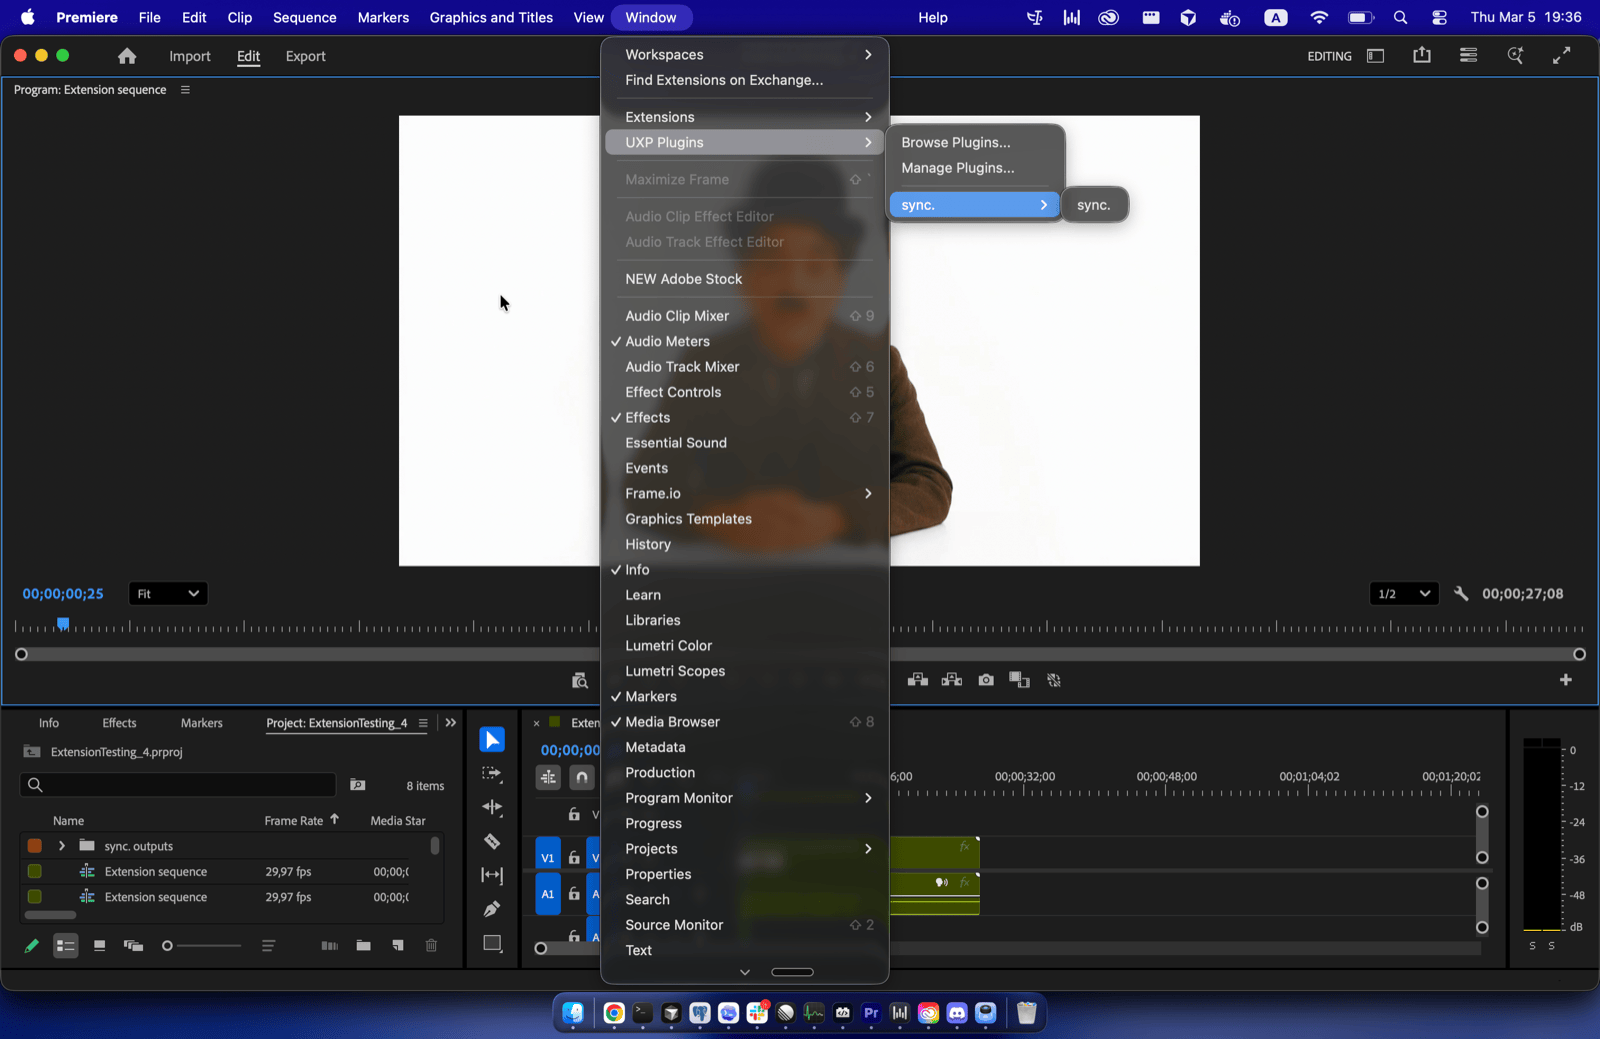
If you don’t see Sync under Extensions, see the Troubleshooting section below.
Troubleshooting
The plugin doesn’t appear in the Extensions menu
In some cases, Premiere Pro needs plugin loading to be enabled in its settings. This can happen even with Adobe Marketplace installs. If you installed the plugin but don’t see it under Window > Extensions, follow these steps:
Open Plugin Settings
In Premiere Pro, go to Settings… > Plugins… — you can also find this by opening the Help menu and searching for “Plugins”.
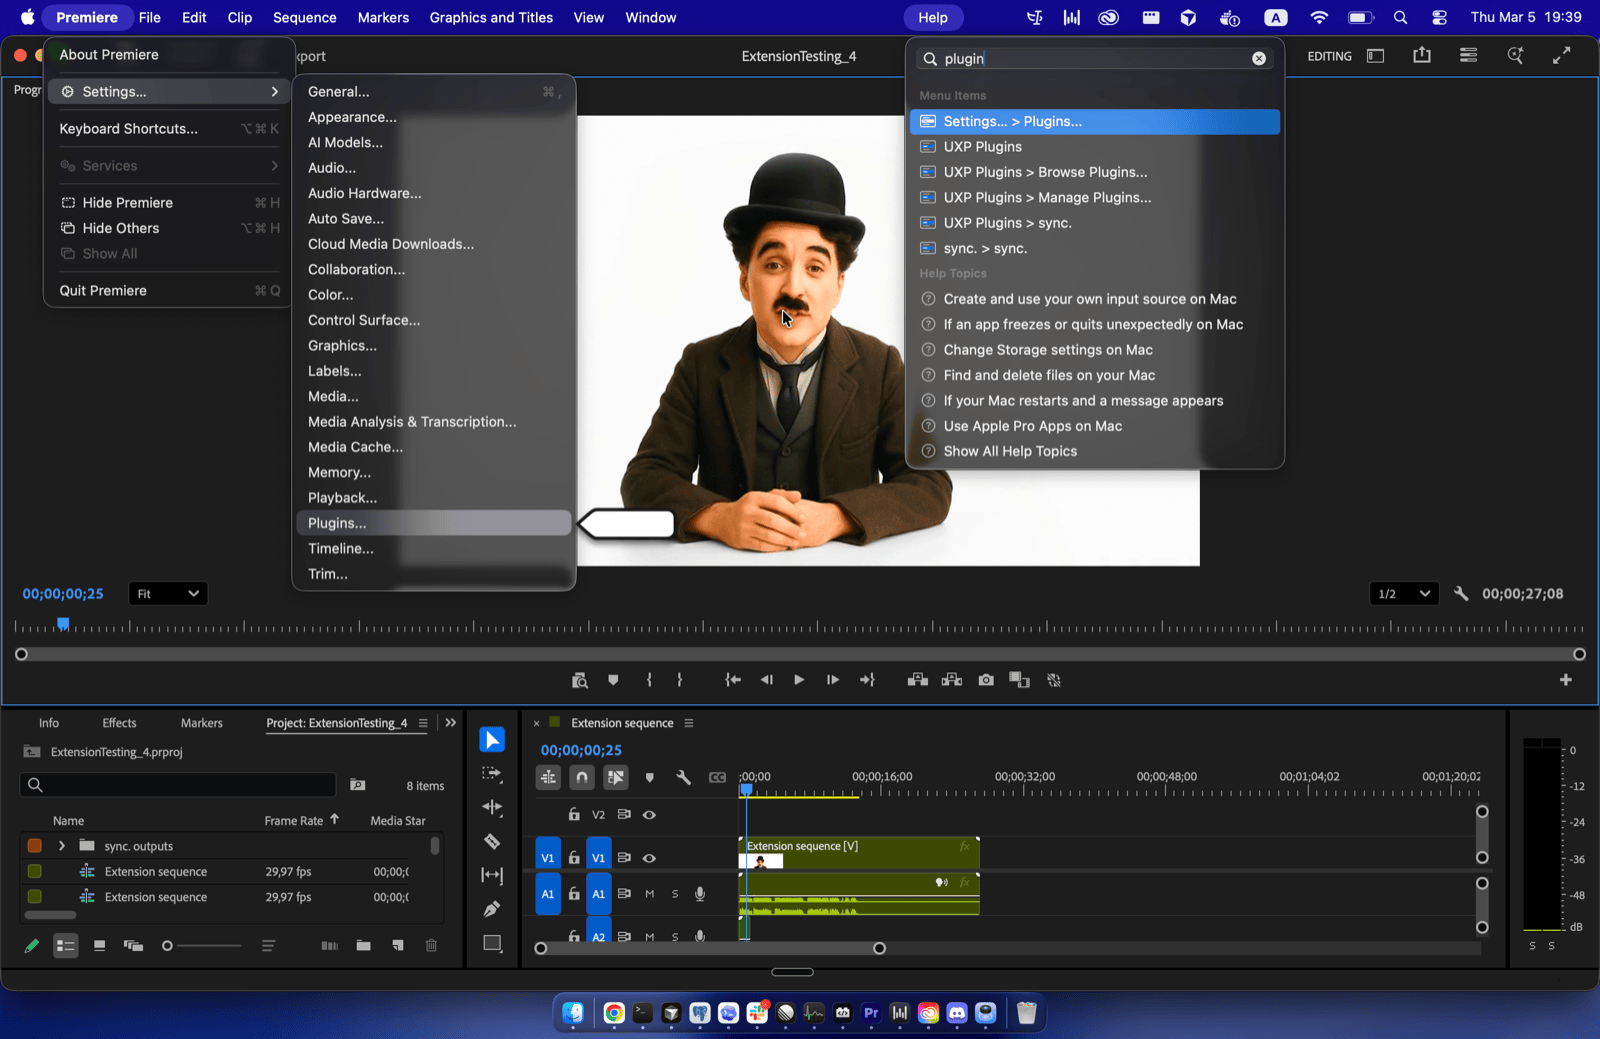
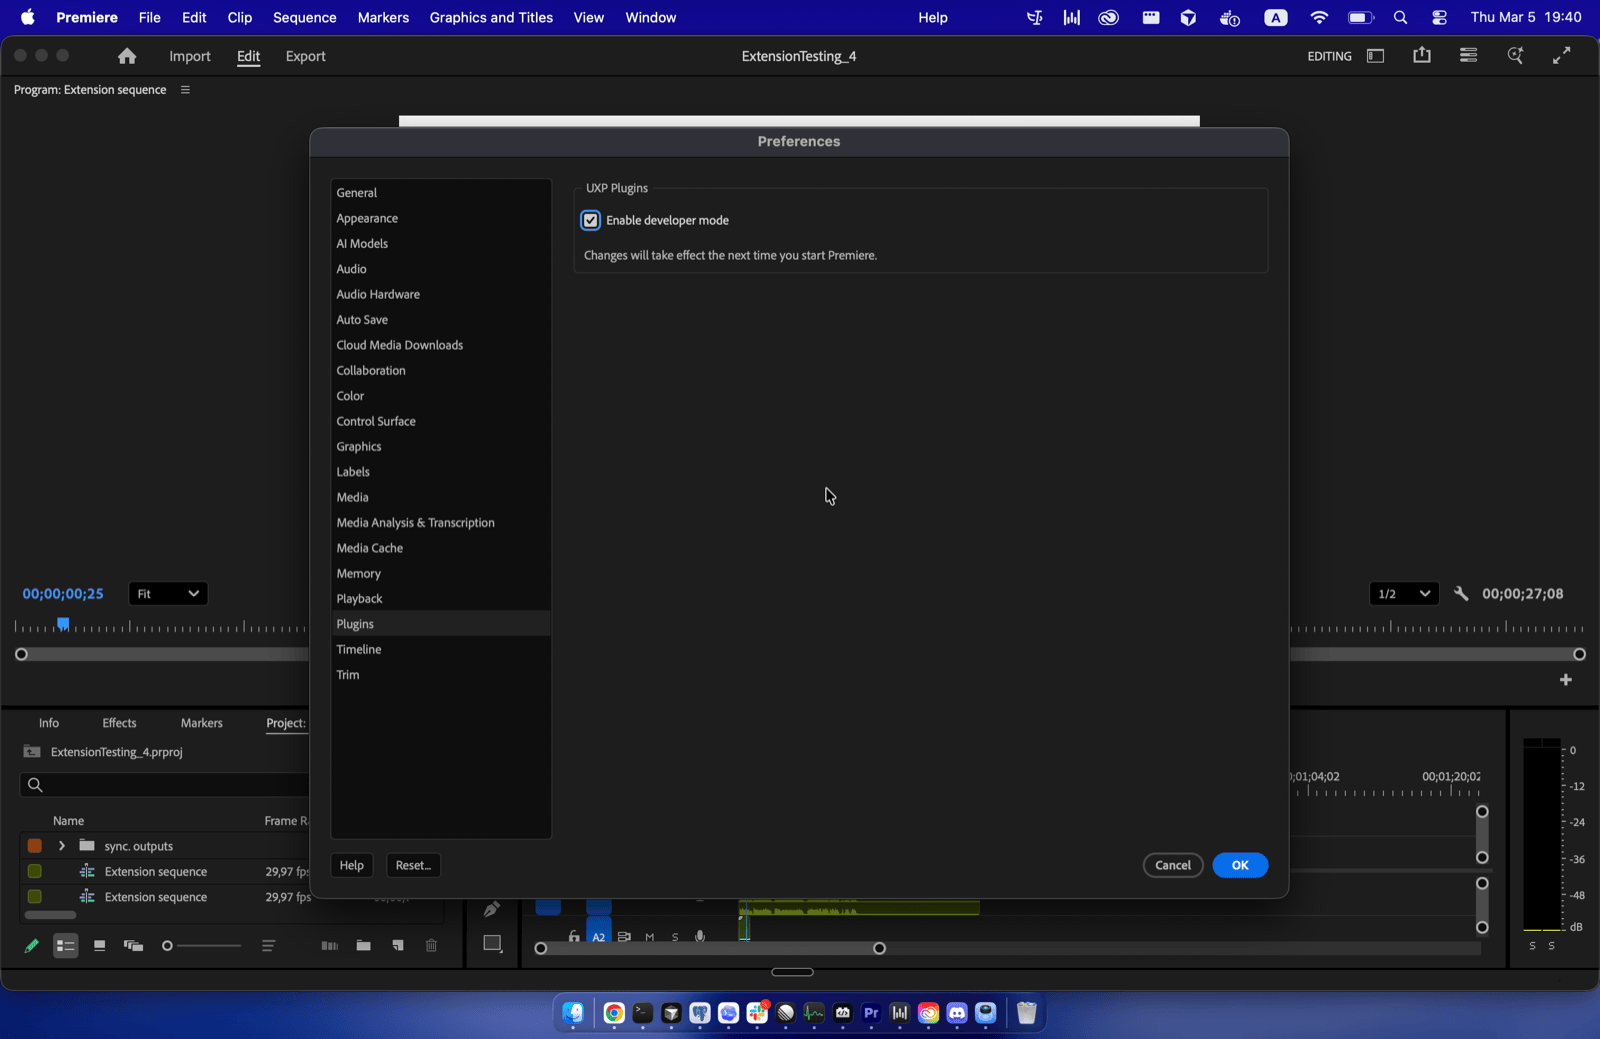
This setting does not affect the stability of Premiere Pro or other plugins. It simply ensures extensions are loaded on startup.
The plugin panel is blank or unresponsive
- Make sure you have an active internet connection — the plugin needs to communicate with Sync’s servers.
- Try closing the panel and reopening it from Window > Extensions > Sync.
- If the issue persists, restart Premiere Pro.
Sign-in issues
- Verify that your Sync account is active by signing in at sync.so/login.
- If you’re behind a corporate firewall or VPN, make sure traffic to
sync.soand*.sync.sois not blocked.
Uninstall
To remove the Sync plugin, open Adobe Creative Cloud, navigate to Stock & Marketplace > Plugins > Installed Plugins, find Sync, and click Uninstall.
Next Steps
Once you’re signed in, head back to the Adobe Premiere Pro Plugin overview to learn how to use timeline selection, the media browser, and direct upload.
- Lipsync Model — learn about the lip sync models available in the plugin
- Billing — view your plan details and usage information

